Your cart
Your cart is empty

Do you know where this tradition comes from?
Pumpkins were traditionally placed on windows or at the entrance of houses to welcome beneficial spirits and to protect themselves from evil.
When the Irish came to America, they used pumpkins, which were plentiful and very practical to handle.
So now you know the history, let’s go, we’ll explain all the steps!
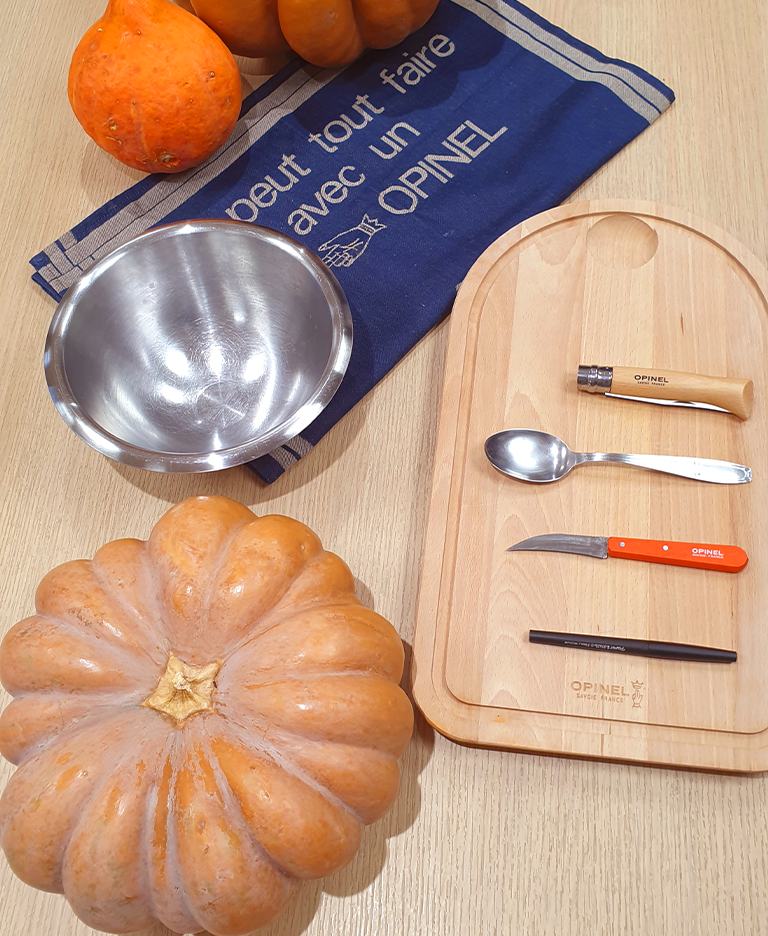
In order to make the most beautiful pumpkin, we recommend to use the following tools:
Be sure to well organized your space to be as comfortable as possible to carry out this activity.

Take a black pen with a thick head, to make it easy and visible on the skin of the pumpkin.
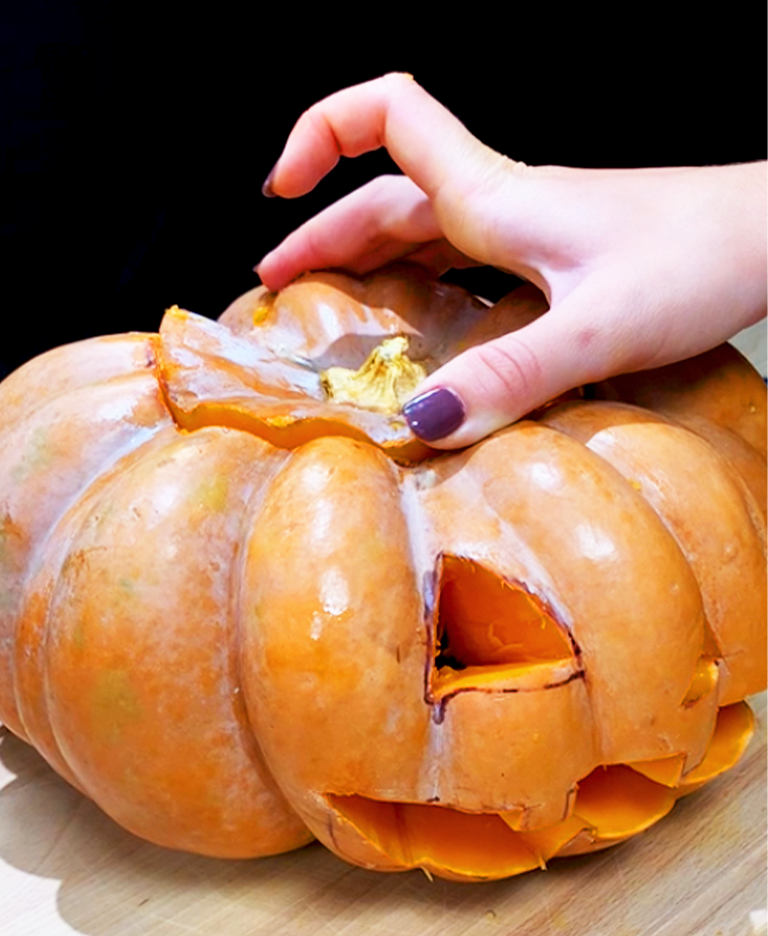
With the pen, draw the outline of your hat on the top of the pumpkin.
This tip will allow you to have a path to respect and to cut with regularity.

This step is quite complicated, we recommend that it be done by an adult so that children do not get hurt.
Use the vegetable knife, pre-cut the cap of your pumpkin, then bring your knife N°10 to ensure a deeper cut.
This will make it easy to remove the hat.
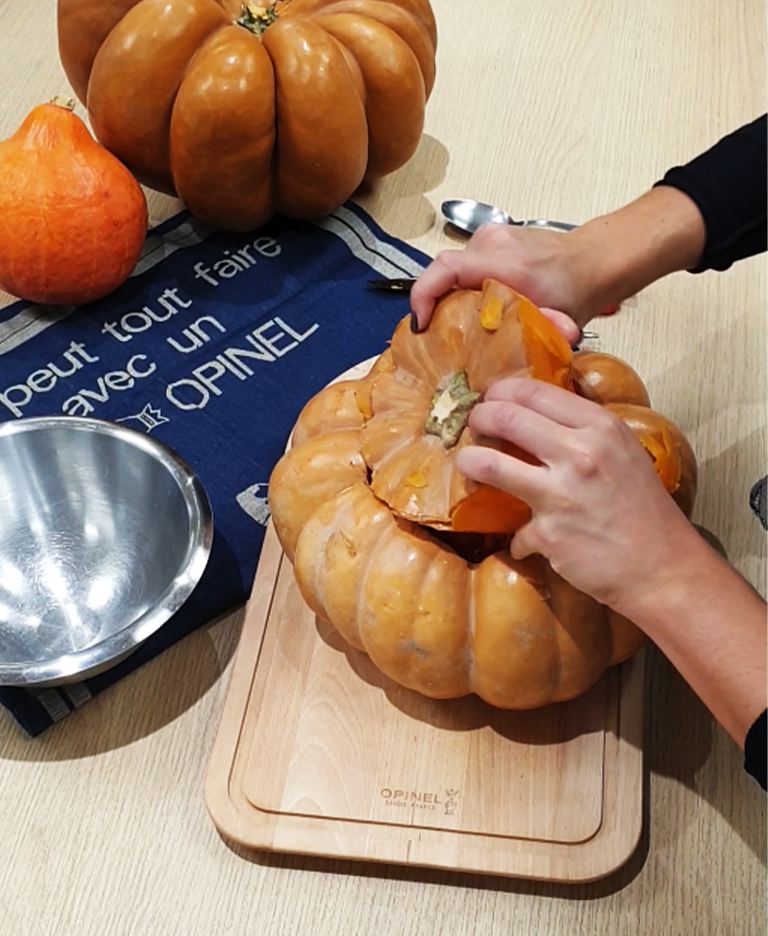
Once the contour is well cut, gently remove the pumpkin hat with your hands to access the inside.
If you encounter difficulties, use the soup spoon as a lever or try to cut again with your knife on the contour to be sure that there are no more points of attachment.
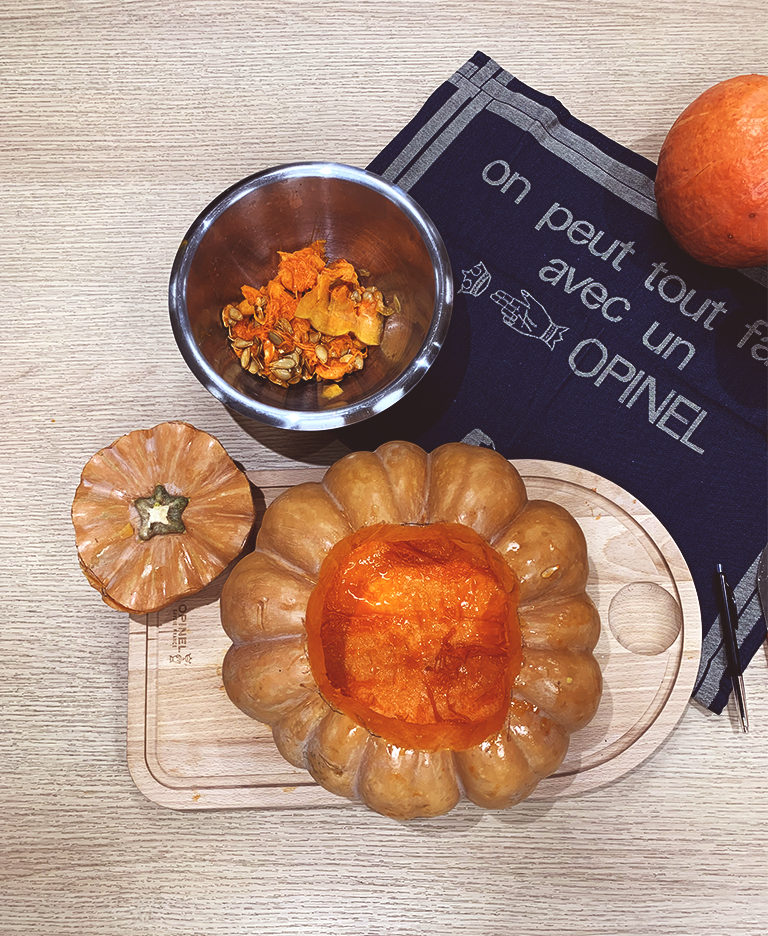
Then, using the tablespoon, empty the inside of the pumpkin, removing the flesh and seeds. Nothing must be left!
Place them in a bowl to use for a great recipe, seeds are delicious.
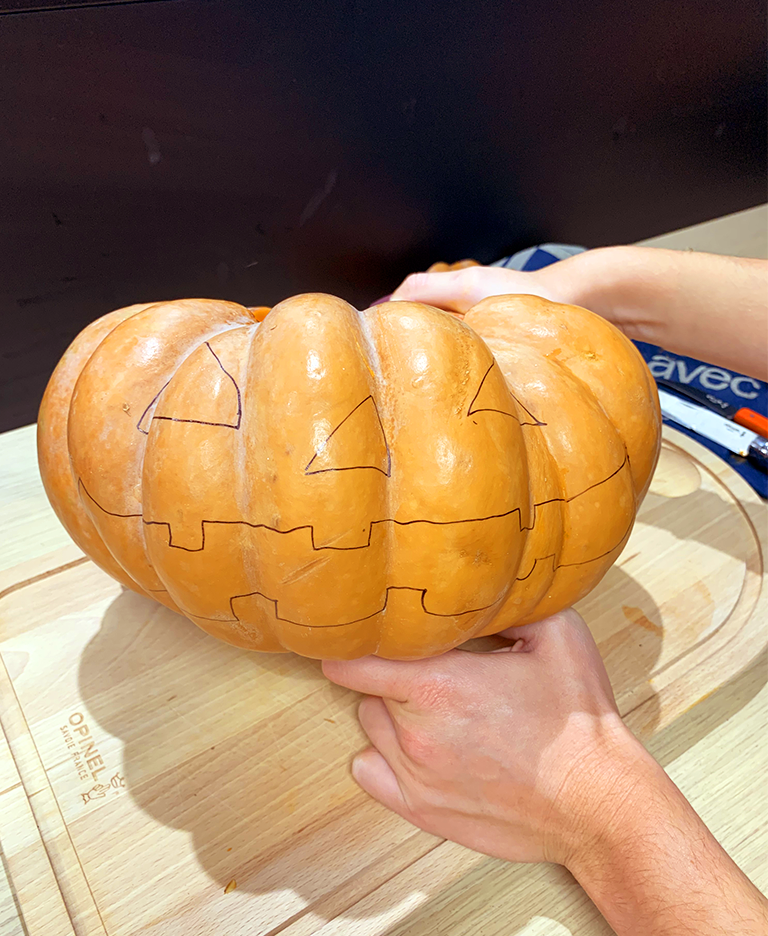
You can train first on a sheet or draw directly on the pumpkin.
Draw the face of your pumpkin with your pen. First draw the eyes, then the nose and finally the mouth. Here is an example of a face but there are many others to imagine with different expressions.
This step allows you to locate yourself during the cutting and therefore not to be mistaken!
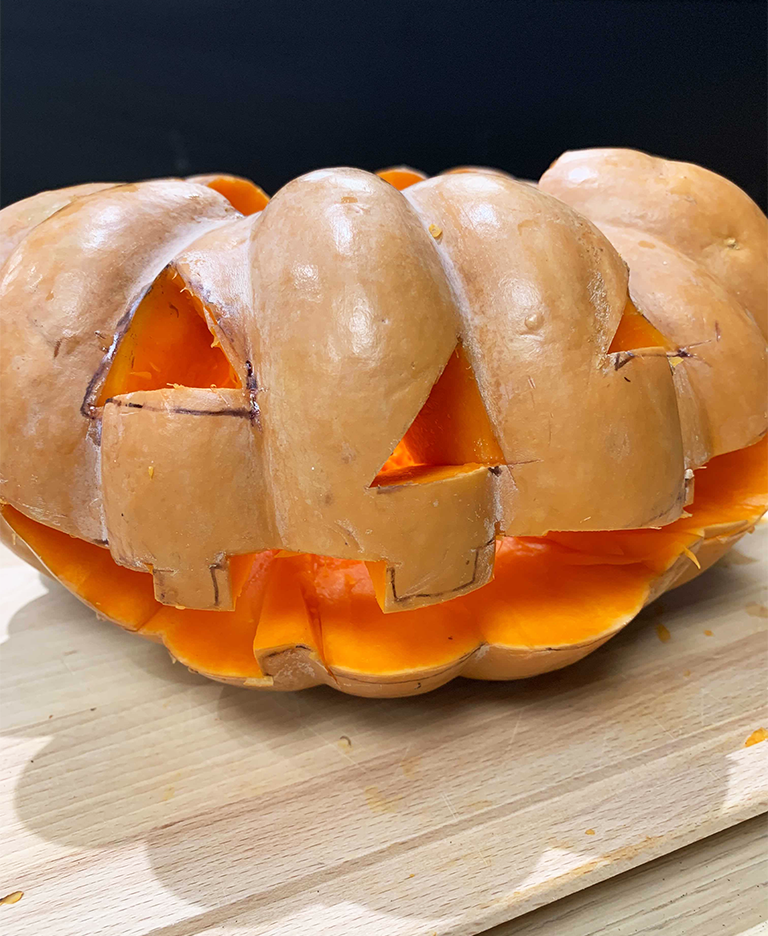
You can now sculpt the face with the knife N°10 or with the vegetable knife depending on the size of your pumpkin.
By following the lines you have drawn in pen, this guarantees you not to be mistaken.
We advise you to start with the eyes, then the nose and finally the mouth.
Be careful not to hurt yourself, it is rather advisable to let adults exercise this delicate step, because the skin of the pumpkin is thick.
To close the pumpkin, gently put on the hat you cut out at the very beginning of the activity.
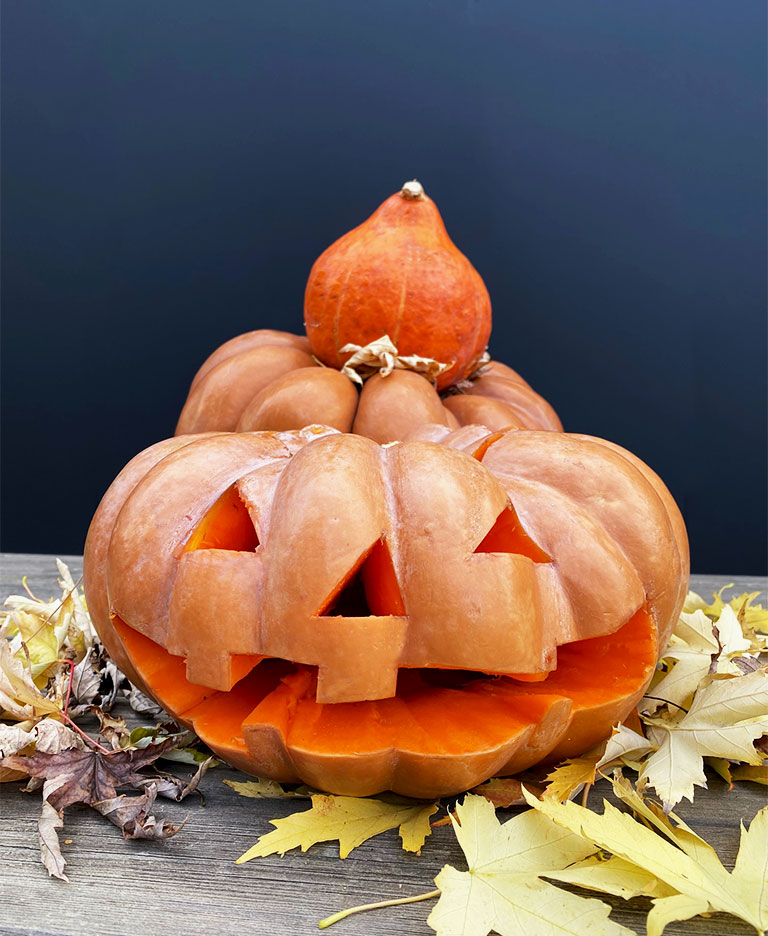
Great!
Congratulations, your pumpkin is ready for Halloween!
You still have to put a small candle inside your pumpkin to bring it to life and make it look scary at night.
Are you sure you want to perform this action?


